How To Properly Maintain Your Gutters Throughout The Year

Gutter systems help to divert water away from the house but can become clogged with debris. It’s important to regularly inspect and clean gutters, preferably twice a year.

Gutter cleaning involves removing leaves, twigs, and pine needles to ensure proper drainage. It’s also a good idea to test downspouts with a garden hose to ensure water is flowing freely. Hire a professional by clicking here at https://www.guttersandmoregutters.com/.

gutter maintenance

Fall

Gutter cleaning is a homeowner maintenance chore that needs to be done regularly, regardless of the season. It helps prevent water damage, foundation issues, landscaping problems, and pest infestations. It is important to keep in mind that there are a variety of materials that can cause gutters to become clogged, depending on the season and outdoor climate.

When the autumn season rolls around, leaves begin to fall from nearby trees, making it crucial to clean your gutters to avoid expensive home repairs. In areas that experience heavy rainfall or snow, gutters can easily overflow and cause damage to your home’s exterior, roof, siding, and landscape.

In addition to leaves, fallen twigs and branches, bird nests, and other debris can also accumulate in your gutter system, leading to clogged drains and overflowing gutters. Gutter guards are a worthwhile investment to help minimize the amount of debris that enters your gutter system.

Another important step to take during the autumn season is to inspect your gutters for signs of wear and tear, such as rust, cracks, or sagging sections. This can indicate the need for repairs or replacement. Additionally, it is essential to ensure your gutters are securely attached to your house and that the downspouts are properly directing water away from your foundation.

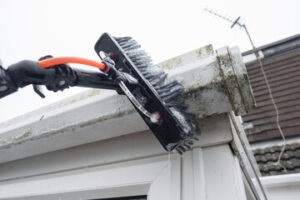
If you’re not comfortable climbing up on a ladder to inspect and clean your gutters, it is recommended that you hire a professional service. They will use a ladder and a gutter scoop to remove debris, flush the gutters, and test water flow. Additionally, they will check for clogged downspouts and untie or clear them if needed.

It is also important to check your gutter spikes to make sure they are tightly fastened and are not bent or corroded from the weight of ice and snow. A poorly secured gutter can pull away from your house, causing it to lean and possibly collapse. In addition, it’s critical to check for icicles and detachments that can cause serious structural damage. If icicles are present, it is suggested that you use an ice-melting product to break up and remove them.

Winter

Gutters that aren’t properly maintained throughout the year can be susceptible to ice dams and frozen downspouts, which can lead to water leakage inside of the house. Regular cleaning and inspections will help prevent these issues by reducing the amount of debris that enters your gutter system. It’s recommended that homeowners perform at least two cleanings per year, with one occurring during the fall.

During these cleanings, property owners should remove debris from the gutters and downspouts. They should also check for pests and birds that may be nesting in the gutters. These pests can create blockages and contribute to the deterioration of the gutters over time.

Property owners should also inspect the gutters for any leaks or cracks. These should be addressed as soon as possible to minimize the damage they cause. If a leak is discovered in the gutters, it’s important to fix it as soon as possible so that water doesn’t seep into the foundation of the home.

Another thing to look for during the winter is icicles that can form from snow and ice melting off of the roof. Icicles are dangerous and can pull down the gutters or lean them away from the home, creating serious structural damage. In addition, icicles can form on the gutters and pull down the fascia boards. Gutter guards can help protect the integrity of the gutter system by preventing the formation of icicles.

Property owners should also inspect the gutters for rust or any other signs of deterioration during the winter. This is especially important if the gutters are not properly installed or made of corrosion-resistant materials. Rust can corrode the joints and seals of your gutters, which can eventually result in leaks. In addition, rust can also lead to the expansion of cracks and openings within your gutter system. This can result in gaps between straight connectors, loosened hangers, and sagging gutters.

Spring

As spring arrives, it’s time to start thinking about cleaning your gutters. This is a necessary task for any homeowner that helps prevent water damage and pest infestations and extends the life of your gutter system. While this task may seem daunting, it is well worth the effort to keep your home in tip-top shape.

During the spring, your gutters can become overrun with pollen and tree sap as the trees begin to blossom and shed their leaves. This can cause the buildup of gunk and clogs that are best addressed by a thorough cleaning. Additionally, the warmer weather can also lead to the buildup of ice dams that can be extremely damaging to your gutters.

If you have gutter guards installed, this can significantly reduce the amount of gunk that needs to be removed from your gutters in the spring. However, if you do not have guards, it is best to remove any large debris from your gutters during the spring to ensure they are clear and ready to handle the rainy season ahead.

Cleaning your gutters in the spring is especially important because it allows you to inspect them for any issues that may need to be addressed before a summer thunderstorm hits. A sudden summer storm can send debris flying from overflowing gutters, causing expensive water damage to your fascia boards and landscaping.

Before starting the cleaning process, make sure you have a sturdy ladder and are comfortable working at heights. Use safety goggles and gloves to protect your eyes and hands. A garden hose with a spray nozzle should be used to rinse out the gutters and downspouts from one end to the other, flushing away any dirt or organic debris. Once all of the gutters have been cleared, it is a good idea to check the hangers and connections to ensure they are secure.

Once the spring rains have begun, it is essential to keep up with your gutter maintenance throughout the year to avoid costly damage and problems in the future. It is recommended that you clean your gutters at least twice a year, once in the fall and once in the spring.

Summer

Summer brings a welcome respite from the cold weather, but it can also put a strain on your gutter system. Heavy summer storms can cause clogs and debris buildup that lead to water damage to your home’s roof and foundation. Preparing your gutters in the summer can prevent these issues from occurring.

Gutter cleaning is essential during the summer to remove leaves, twigs, and other debris that can block water flow and cause overflow. Make sure to take safety precautions by using a stable ladder and wearing gloves to avoid falling or getting cut by sharp debris. Additionally, be sure to inspect the area around your house to ensure there are no overhead power lines or other obstacles that may pose a danger while you’re working on your gutters.

After your gutters are free from debris, it’s a good idea to examine the entire system for signs of wear and tear. Look for cracks, rust, and sagging sections that could compromise the efficiency of your gutter system. Also, ensure that your gutters are securely attached to your home and that the downspouts are at an effective angle to carry water away from your home.

Regular maintenance of your gutters throughout the year can help protect your home from serious water damage and extend the lifespan of your gutters. By implementing these simple tips, you can rest assured that your gutters will be well-maintained and ready to handle whatever summer storms come your way! Contact us today to learn more about our gutter services and how we can assist you in protecting your home from water damage.

Insulation Removal – An Involved DIY Project

Insulation Removal Perth is a DIY project that requires extensive preparation and strict safety measures. First, homeowners should consider why they want to remove their insulation.

In many cases, addressing issues like moisture damage, mold, and rodent infestations is necessary. A professional attic inspection will help determine the best method of removal.

If you own an older home, chances are that your attic insulation needs to be updated or repaired. Poor insulation can lead to lower energy efficiency, reduced air quality, and even pest infestations. If your insulation isn’t performing well, it may be time to consider removing and replacing it. This task isn’t a do-it-yourself project for beginners. The costs associated with obtaining or renting the right equipment, the cost of old insulation disposal, and your time investment should be considered before you decide to take on this task.

The first step in preparing for attic insulation removal is to ensure that you have the right equipment. This includes a commercial-grade vacuum, a ladder, and a set of protective equipment. Gloves are an essential item for protecting your hands from sharp objects and potential irritants, while a mask will help to prevent inhalation of mold spores or other particles. Eye protection is also recommended to reduce the risk of irritants getting in your eyes. If possible, full-body coveralls are ideal to protect your skin from the harshness of cellulose insulation.

Once you have the appropriate gear, it’s time to clear out the attic space. This will help you to easily navigate the area while minimizing the amount of mess that is made in your living space. You should also clear out any items that are normally stored in the attic to avoid damaging or contaminating them during the process.

Depending on the type of insulation you have, removing it can be a messy job. It is a good idea to lay down some drop cloths to minimize the amount of mess that is made in your home. It is also recommended that you wear a face mask for extra protection during the removal process.

Once you’re finished removing the insulation, it’s a good idea to seal the attic access door. This will help to prevent air leakage in the future and increase your home’s energy efficiency. The best way to do this is by using a piece of rigid foam, but spray foam or caulk can also be used for this purpose.

Safety Measures

Insulation removal is an important part of maintaining a healthy and energy-efficient home. However, it can be dangerous if proper safety measures are not followed. Old insulation can contain environmental hazards like asbestos and may be infested with pests or mold, posing health risks for homeowners. Insulation also degrades over time, losing its insulating properties, making it less effective and increasing utility costs. This may be due to moisture damage, pest infestation, or simply ageing.

To ensure a safe and efficient process, it’s essential to establish a removal plan. This begins with an assessment of the attic space to identify the type and condition of insulation present. The attic should be cleared of obstacles and obstructions to make space for work, while protective coverings should be laid down to shield surfaces from damage or contamination. A clear workspace helps prevent injury to workers and ensures a smooth and seamless process. It’s also important to have the necessary personal protection gear, including a respirator mask or nose filter and gloves to minimize contact with dust, dirt, and insulation particles.

It’s important to note that electrical wiring can be located in the attic space, posing a significant risk of electric shock and fire during the removal process. It’s therefore crucial to turn off the power and disconnect all live wires before starting to remove insulation. This also prevents the accidental disturbance of insulation materials that may release airborne fibers.

Once the attic is clear and prepared for insulation removal, a professional insulation removal team can begin the work. Depending on the type of insulation, it may be removed by hand or machine. Hand removal is typically best for fiberglass batts, while spray foam is best for large spaces.

Once the attic space is empty of insulation, it’s vital to thoroughly clean and vacuum the area to eliminate any remnants or contaminated materials. This can be done with a high-powered vacuum cleaner, which also eliminates excess dust and particles and helps to maintain the cleanliness of the attic space. It’s also essential to ensure that any contaminated or hazardous materials are recycled or disposed of according to local regulations.

Preparation

Insulation is a vital component of a home’s structure, providing effective temperature regulation and enhancing indoor air quality. However, over time insulation can degrade due to various factors, including moisture, pest droppings, or fire damage. When this occurs, it may be necessary to remove the existing insulation and replace it with new materials. Insulation removal requires proper safety measures and a thorough inspection, ensuring the best results.

Before beginning, it is crucial to establish a workspace and plan out the process. Ensure there is a clear path from the attic access to the work area and protect surrounding surfaces with drop cloths or plastic. In addition, it is recommended to wear personal protective equipment to prevent inhalation of dangerous dust particles and other contaminants.

Once the attic is clear of obstructions, it’s important to set up a ladder and begin removing the old insulation. It’s also a good idea to take breaks frequently, as working in an attic for prolonged periods can cause fatigue and heat stress. Once the attic is empty, the contaminated insulation should be rolled up and placed in waste bags.

The final step in the process is a thorough vacuuming of the attic. Professionals will use industrial hoses to ensure the entire attic space is cleared of all debris, leaving nothing behind for future problems. This is particularly important if you’re planning to use the attic for another purpose, like rodent proofing or rewiring. Attempting to work around the old insulation can result in contamination of the new materials and compromised results.

Upgrading insulation can help improve energy efficiency, lower utility bills, and promote long-term comfort. Modern insulation materials, such as blown-in cellulose or spray foam, offer superior thermal performance and are less prone to degrading or contamination. To get the most out of your investment, it’s a good idea to consult with a qualified insulation contractor about the best options for your home. They can guide you on the different types of insulation, installation techniques, and energy-saving benefits. They’ll also be able to advise on the most cost-effective solutions for your project, based on the size of the attic, type of insulation, and any additional services you may require.

Disposal

Insulation removal can be messy, but it’s important to dispose of the insulation properly. This will ensure that the materials are not contaminated by rodents, mold, pests or other harmful organisms that could enter your living space, causing health issues or structural damage. This also helps to safeguard the environment, as improper disposal can lead to environmental hazards and potentially even legal consequences.

If you have blown-in fiberglass or cellulose insulation, the material can be recycled through your local waste management facility. Contact your facility to learn more about what to expect with regard to drop-off and processing options. However, if you have contaminated insulation, this material cannot be recycled and must be disposed of properly as hazardous waste.

Before handling insulation, always wear protective clothing, gloves, goggles and a respirator to prevent direct contact and inhalation of fibers. Make sure that the work area is well-ventilated and keep your children and pets out of the space to minimize the risk of irritation and exposure to harmful materials.

For cellulose insulation, it’s recommended that you use a high-powered vacuum to suck up the material and dispose of it in trash bags. It’s a good idea to place a tarp under the bags as you fill them to facilitate clean-up. Once the job is completed, make sure that you put the trash bags in a larger, higher-density bag for additional security and to limit air flow.

You can also safely dispose of fiberglass and mineral wool insulation by calling your local waste management facility to find out more about the process, including drop-off and processing options. You may have to pay a fee for these services.

The best way to handle the process of removing your old insulation is by hiring a professional service. They will have the proper equipment to remove batt insulation, including a vacuum system, decontaminating chemicals and rodent-proofing tools. Additionally, they will have the expertise needed to inspect the area and make recommendations for replacement materials. This will ensure that your home is safe and energy efficient and will help you save money in the long run.

Ceiling Repairs You Shouldn’t Ignore

While ignoring any damage found on your ceiling might be tempting, putting off repairs could lead to more extensive and expensive problems. The sooner you call a professional to inspect and repair your roof, the better.

Cracks in the ceiling can be cosmetic and easily fixed with joint compound or drywall mud. On the other hand, water stains indicate an underlying issue and should be addressed as quickly as possible to prevent further damage. Contact Ceiling Repairs Perth now!

A crack in the ceiling may not always be a big deal, but it can indicate a serious problem and should not be ignored. Cracks in the ceiling can be caused by a variety of things, including structural damage, ground movement, and uneven foundation settlement (usually accompanied by wall cracks). If you notice a crack in your ceiling, getting a professional assessment as soon as possible is important to determine whether it is a serious problem.

Hiring a professional to perform ceiling repairs is a good idea, especially if the cracks are a sign of structural or severe water damage. This step will ensure that the damage is addressed before it gets out of hand and save you money in the long run.

Depending on the severity of the crack, you might be able to repair it yourself with the help of some simple supplies:

  1. Clean the area around the crack with a damp cloth to remove any dirt or debris.
  2. Use a putty knife to apply spackle or joint compound over the crack and make sure it is completely covered. Make sure that the new joint compound is smooth and even and allow to dry according to the product instructions.
  3. Sand the area with fine-grit sandpaper to create a smooth surface and paint the patched area to match the rest of the ceiling.

If the crack is in the center of your home or is getting wider, it is likely due to structural issues. This type of crack can be very dangerous and must be fixed as soon as possible to ensure the safety of you and your family. It is also a good idea to have a professional assess the issue as soon as possible, as they will be able to recommend the best course of action to take.

Structural cracks in the ceiling are usually a result of differential settlement of the foundation which puts stress on the drywall and can cause it to crack. Differential settlement can be caused by a number of factors, including soil conditions, construction methods and insufficient framing.

Water Stains

Water stains on your ceiling aren’t just unsightly, they can indicate a serious problem that will only get worse if ignored. Water damage to a ceiling may lead to mold or rot that can compromise the structure of your home or create a fertile environment for bacteria that causes health issues like rashes, dizziness, headaches, and asthma attacks. Covering a water stain with a fresh coat of paint will only mask the issue and could lead to an expensive ceiling restoration job down the road.

Whether you have an old water stain on your ceiling or recently noticed one forming, it’s important to address it promptly because it could signal a problem with your roof or plumbing. Water stains are easy to spot because they are typically large, amorphous, and darker than other types of stains. To prevent further damage, you should take the following steps to repair your ceiling:

Begin by identifying the source of the water stains. This will help you determine the best course of action to fix the problem and stop the recurrence of the stains. The source of the stains might be from a leaky pipe, or it could be from condensation that is caused by poor ventilation and lack of insulation in your attic.

Before you begin removing the water stain from your ceiling, make sure to turn off electricity and water supply in the area of the home where you’ll be working, and put on rubber gloves and safety goggles. You’ll also want to make sure the room is well-ventilated so that you don’t breathe in the bleach solution. Next, blot up excess moisture with a paper towel or cloth. Do not rub, as this will only spread the stain. After soaking up the excess water, mix a solution of warm water and mild detergent or dish soap. Dip a sponge into the solution and gently dab at the stain, working from the outside in.

Once the stain is removed, apply a stain-blocking primer that is formulated for use on textured ceilings. This primer will bind pigments and prevent bleeding from the stained area, and it will also reduce the risk of mold growth in the ceiling. Let the primer dry for at least two hours before painting over it.

Leaks

Water spots or stains on your ceiling aren’t just unsightly—they also indicate a serious problem that could require professional help. When water leaks into your home, it saturates drywall and wood, which can eventually rot or develop mold. The best way to stop a leaking ceiling is by finding and fixing its source, which may be an issue with your plumbing or roof.

Water stains are the most common sign of a ceiling leak. If a water spot or stain appears, it’s crucial to act quickly because the longer you wait, the more damage the leaking water can cause. This can include structural damage, compromising the integrity of your ceiling and other structures in the room, and creating a environment for mold and mildew growth.

To find and fix a ceiling leak, start by shutting off the water supply, which will usually be on a switch or faucet in the affected area. Then, place a bucket or tarp beneath the area where the water is coming from. Next, locate the area of the leaking ceiling and identify its source—this can be difficult since the water may have already begun to spread. Finally, repair the area of the leaking ceiling, which might involve replacing drywall and repainting or retexturing.

When repairing ceiling leaks, it’s also important to dry the affected area as much as possible. This can be done by opening up the ceiling and letting air circulate, using fans, or placing dehumidifiers in the room. Additionally, if you decide to paint over the damaged area, make sure to use joint compound with a stain blocker—this will keep the new coat of paint from staining and peeling.

Leaking walls and ceilings are one of the most challenging problems for homeowners, but identifying a problem and making the right repair can help protect your home from costly and time-consuming damage in the future. By identifying the most common issues and knowing when to call in the experts, you can take steps to prevent water damage and stains from ruining your ceilings and other parts of your home.

Insulation

Insulation is one of the most important components in keeping a home safe and comfortable. It restricts the flow of heat and electricity, reducing energy consumption and lowering utility bills. It also reduces noise and prevents the spread of mold. However, insulation does require maintenance to stay effective. It should be checked regularly and replaced if necessary.

When inspecting your home’s insulation, it is a good idea to wear protective gloves and a face mask. This is because fiberglass insulation can break off into sharp shards when handled without the proper precautions. The shards can cause eye and lung irritation as well as itching. The best way to keep your home’s insulation intact is to hire a professional. They’ll be able to use special equipment like a blow-in insulation machine to fill your walls and ceilings with the right amount of insulation without making giant holes in your wall or ceiling.

In addition to repairing insulation, professional contractors can also repair plaster and drywall. Damaged plaster typically appears as crumbling or peeling, and it’s often caused by moisture infiltration and aging of the material. Drywall can be repaired with a variety of methods including patching, spackling, and refinishing.

Water damage is another common issue that can affect the integrity of your ceiling. Leaks from the roof or plumbing can cause unsightly stains and significantly reduce the lifespan of your ceiling materials. Identifying the source of the leaks and addressing it promptly can help reduce structural damage and the risk of mold growth.

Ideally, high-quality insulation should be incorporated during construction of a new home. This will result in higher performance and lower energy costs. It’s also possible to retrofit insulation in existing homes during renovation projects, but the process can be more difficult and costly than installing it at the time of construction.

The Differences Between an Attorney and a Lawyer

Many people use the words attorney and lawyer interchangeably. However, slight differences between the two could impact your interactions with the law.

An attorney is a legal professional who graduated from law school, passed the bar exam, and is licensed to practice law in their state. They have many roles and responsibilities. Click Here to learn more.

Whether preparing for the bar exam or seeking to advance their careers, attorneys need an ongoing commitment to professional development. They must cultivate their thinking abilities, research proficiency, effective writing skills, and reading comprehension. They must also develop oral communication skills to represent clients and deliver presentations effectively. In addition, many attorneys seek to expand their network through a variety of lawyer training and networking opportunities, including conferences, meetings with fellow lawyers, online courses, webinars and workshops.

Many law firms offer a wide array of lawyer training, with some programs tailored specifically for new associates. These new attorney training programs help prepare new hires for a successful career in the legal industry. Other programs may focus on developing lawyer skills to address specific business goals, such as writing and negotiation skills. Using self-assessments can help lawyers determine the best type of new attorney training for their needs.

One way to increase attorney training opportunities is to become a member of a bar association or a professional networking group that supports lawyers in your practice area. Participating in these networks can help you develop your relationships and gain insights from experienced mentors. Other ways to increase attorney training include becoming a published author, blogging, or creating online guides and resources to showcase your expertise and establish yourself as a leader in your field.

Incoming associates at Kasowitz participate in a series of training programs designed to help them integrate into the firm and ease their transition from law school to law practice. These programs, which are known as Kasowitz University (KU), cover topics ranging from the fundamentals of practice and case analysis to transactional skills. KU is followed by a week-long orientation program called HB Foundations. During this course, firm leaders provide an overview of the strategic direction and culture of the firm.

Several online and virtual law conferences, meetups and workshops can also provide CLE credits for attorneys who wish to expand their knowledge of specific areas of the legal industry. These events often include presentations by prominent members of the bench and bar, as well as legal experts from outside firms.

Licensing

As with other regulated professions, the law requires attorneys to be licensed. The licensing process generally includes graduating from an ABA-accredited law school, passing the Multistate Bar Examination (MBE) and passing the state’s bar exam. Many states also require that potential lawyers pass the Multistate Professional Responsibility Exam (MPRE) as well. The licensing process often takes between three to seven years after graduating law school. The licensing process may include a character and fitness review, which generally involves reference checks, employment history verifications, reviews of letters of recommendation and criminal background investigations. State bar associations have the power to suspend or revoke attorney licenses.

While licensure is required for practicing attorneys, there are a number of exemptions to this rule. Practicing without a license can carry serious consequences including fines, suspension or even disbarment. In order to practice law, an attorney must be a member of his or her state’s bar association. The association has the authority to investigate complaints, prosecute lawyers for misconduct, and oversee the legal community as a whole.

In some jurisdictions, attorneys can be admitted to the bar on motion, which eliminates the need to take a bar exam. However, this type of admission is generally subject to a number of strict criteria, including a character and fitness review by the state’s supreme court or board of bar examiners, certificates of good standing from other jurisdictions where the lawyer has been admitted to practice and proof of good moral character.

The Hankin Patent Law Firm has extensive experience negotiating and drafting License Agreements between clients in a variety of industries, including fashion, jewelry, computer software, home theater and manufacturing. The Firm can assist with licensing issues that are unique to each client’s situation and help ensure the best possible terms for both parties. To learn more, contact us.

Continuing Education

Many attorneys take CLE courses to meet state and jurisdiction requirements to maintain their license to practice law. This education keeps lawyers updated on legal trends and developments as well as sharpens their skills. It can also help them keep their client’s best interests in mind, avoid disciplinary action and remain ethical in their practice.

Continuing education opportunities for attorneys are available both in-person and online, depending on the individual’s needs and preferences. In-person classes and seminars provide an immersive experience with expert instructors and peers. They may focus on specific legal topics or broader legal skills. These can include ethics, case law update, legal research, writing skills and more.

Online CLE courses are often more flexible and convenient for busy legal professionals. They can be self-paced and offer a range of learning formats to fit the needs of different learners. Some courses can be completed via live webinars or pre-recorded videos and include interactive exercises and quizzes. Others are offered as self-study textbooks with a final exam at the end. Some online CLE programs also offer downloadable materials that can be used for reference as needed.

While CLE courses are typically required for attorneys, they can be beneficial for paralegals as well. Some of the same courses that are designed for attorneys can be taken by paralegals, as long as they are appropriate for their specific license type and state CLE requirements. These include courses on general legal principles, new laws and regulations, recent court decisions and more.

Continuing legal education is essential to the success of any attorney or legal professional. It helps them stay up to date on legal trends and changes, which allows them to serve their clients better and protect their own professional reputation. This is why it is important to find a reputable provider with a variety of course offerings and formats to fit your schedule and learning style. For example, Lorman Education Services provides CLE courses in various formats, including live webinars and ondemand courses that are both interactive and engaging. This includes a three-hour on-demand course that discusses VAWA 2021, renewal in Congress and its impact on victims of domestic violence.

Experience

Many law school graduates gain experience by working as a legal intern or as an extern in a firm. This provides practical hands-on training and familiarizes them with the realities of practicing law. This is a critical step before pursuing the bar exam, which can be grueling and requires substantial preparation.

Once an attorney is admitted to the bar, he or she will likely continue learning through professional development opportunities and conferences. These sessions can hone communication skills, legal know-how and creativity. In addition, CLE courses help attorneys keep up to date with new laws and regulations in their fields of practice.

Throughout the foundational years, attorneys will gradually build up their expertise and start taking on more complex work, often under the supervision of partners or senior associates. This is also a time when attorneys can look for career segue options outside of a traditional law firm setting.

For example, if an attorney has regulatory experience in the funds, superannuation or financial services industry, he or she can consider working for a large investment bank as a mergers and acquisitions lawyer. These positions often provide better pay and more opportunities for advancement. Many of these jobs require a blend of legal and business acumen, which is often in line with the aspirations of many attorneys.